How to Set Up a Horseshoe Throwing Pit at Home: A Step-by-Step DIY Guide
So, you’re ready to bring the fun of horseshoe throwing right into your own backyard? You’re in the right place. Whether you’re a seasoned player or brand new to the game, setting up a horseshoe throwing pit at home is easier than you might think—and it’s one of the best decisions you’ll make for backyard entertainment.
In this guide, we’ll cover everything you need to know about how to set up a horseshoe throwing pit, from choosing the right location and materials to understanding pit dimensions and step-by-step building tips. We’ll even sprinkle in some design ideas and expert tips to help you create a setup that fits your space, your budget, and your vibe.
🧱 Why Build a Horseshoe Pit at Home?
Before we get into the how-to, let’s talk about the why. Building your own pit means:
-
No need to go to the park to play.
-
A built-in excuse to invite friends over.
-
A designated space to improve your throwing game.
-
A timeless activity just steps from your door.
And let’s be honest—there’s just something cool about having your own game setup. It’s part backyard project, part legacy-builder.
📍 Choosing the Best Spot for Your Horseshoe Pit
The first step in setting up your home horseshoe pit is choosing the right location. You don’t need a ton of land, but the area should check a few key boxes:
✅ Look for:
-
Flat, level ground – This keeps the playing field fair and makes setup easier.
-
Open space – Ideally, you’ll want about 40 feet in length for a regulation layout. But don’t stress—you can scale it down for casual play.
-
Safe surroundings – Avoid placing the pit near windows, fences, cars, or anything else that could suffer a stray toss.
-
Good drainage – Horseshoe pits don’t play well with puddles.
Pro Tip: If you’re in a sunny area, position your pits so players don’t have to throw directly into the setting sun.
📏 Horseshoe Pit Dimensions: Regulation vs Casual Setup
The regulation layout for horseshoe pitching is great if you want to practice seriously or host real tournaments. But for backyard fun, feel free to tweak these measurements to fit your space.
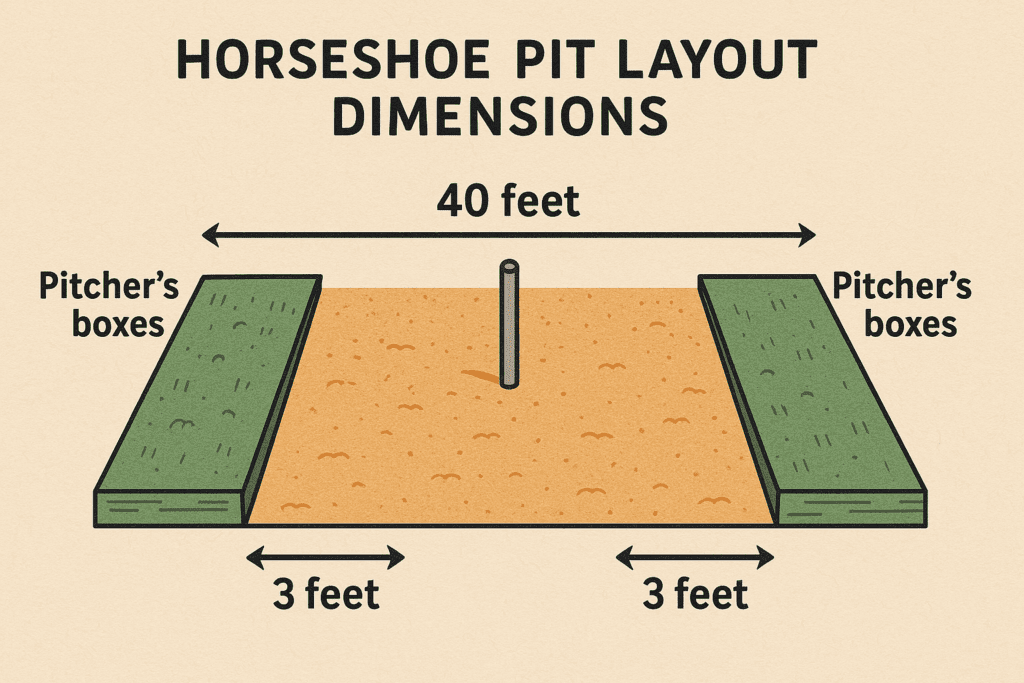
Regulation Horseshoe Pit Layout:
-
Distance between stakes: 40 feet (measured from the front of each stake)
-
Stake height: 15 inches above ground
-
Stake angle: Leaned back about 12 degrees
-
Pit size: Each pit should be 36 inches wide and 72 inches long
-
Foul lines: 27 feet from each stake (players must stand behind these when throwing)
Modified Backyard Layout (for tight spaces):
-
Distance between stakes: 30–35 feet
-
Stake height: 12–15 inches
-
Pit size: 3 ft by 5 ft is plenty for casual play
🛠 Tools & Materials Needed for Your DIY Horseshoe Pit
Here’s a list of what you’ll need to build a simple but solid horseshoe pit.
Basic Tools:
-
Shovel
-
Measuring tape
-
Carpenter’s level
-
String and stakes (for layout)
-
Rake
-
Hammer or mallet
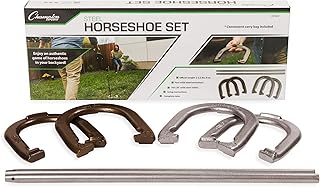
Horseshoe Game Set
Materials:
-
2 horseshoe stakes (1-inch diameter steel rods, 36 inches long)
-
Sand, clay, or a sand-clay mix (about 2–3 cubic feet per pit)
-
Wood for pit borders (4×4 treated lumber, landscape timbers, or similar)
-
Screws or rebar (for securing wood)
-
Optional: weed barrier fabric, gravel (for drainage)
🏗 Step-by-Step: How to Build a Horseshoe Pit at Home
Ready to dig in? Here’s your step-by-step guide:
Step 1: Mark the Layout
Use your string and stakes to mark out the layout of your pit. If you’re going full regulation, mark two pits 40 feet apart. Keep the pit areas at least 3 feet by 6 feet.
Make sure everything is square and level. Measure twice, dig once.
Step 2: Dig the Pits
Dig two shallow pits, about 6 to 8 inches deep. This depth helps hold the sand or clay in place while also absorbing the impact of thrown horseshoes.
If your yard doesn’t drain well, dig a few extra inches and lay down some gravel first.
Step 3: Frame the Pits
Use treated wood or landscape timbers to frame the perimeter of each pit. Secure the corners with screws or rebar stakes. This keeps the pit material from spilling out and gives your setup a clean, finished look.
Optional: Add a backboard at the end of each pit to catch wild throws and protect your landscaping.
Step 4: Install the Stakes
This is the heart of the game. Drive your stakes 15 inches above ground level, tilted slightly backward at a 12-degree angle. Make sure they are firmly planted—you can use concrete for added stability, especially if your soil is soft.
Pro Tip: Use a level and protractor to get your angle and alignment just right.
Step 5: Add the Pit Material
Now fill each pit with your playing surface of choice:
Pit Material Options:
-
Sand – Easy to install, soft on impact, and low maintenance.
-
Clay – Traditional choice for serious players; it’s heavier and offers a more authentic bounce.
-
Sand-Clay Mix – Best of both worlds, great for a backyard setup.
Spread the material evenly and use a rake to level it out. The depth should fill to the top of your frame.
🎨 Design Tips: Make Your Pit Look Good Too
A horseshoe pit doesn’t have to be an eyesore. With a little creativity, it can actually elevate your outdoor space.
Backyard Horseshoe Pit Style Ideas:
-
Rustic – Use reclaimed wood, railroad ties, and natural stone.
-
Modern – Keep lines clean, use concrete borders, and sleek seating.
-
Garden-integrated – Add plants or mulch beds around the pit to blend it with your landscaping.
-
Lighting – Install solar lights or string lights for nighttime games.
🛠 Extra Features to Consider
If you want to go beyond the basics, here are a few bonus features:
-
Benches or seating nearby
-
Scoreboards (chalkboard or magnetic)
-
Drink holders or side tables
-
Storage box for shoes and tools
🔁 Maintenance Tips to Keep Your Pit in Top Shape
To keep the good times rolling, a little maintenance goes a long way.
Weekly:
-
Rake the pit material.
-
Smooth out holes and divots.
-
Check stake stability
Seasonally:
-
Add more sand/clay as needed.
-
Cover your pit in rainy or snowy months.
-
Check for wood rot or loose borders.
Pro Tip: Use a tarp to protect your pit between uses and extend its lifespan.
🧠 Safety Tips for Backyard Horseshoe Throwing
Like any game with flying objects, safety matters.
-
Keep the throwing lane clear of kids, pets, and distractions.
-
Never walk near the stake while someone is throwing.
-
Set ground rules before you start playing.
-
Use lightweight, rounded-edge horseshoes for younger players.
👥 Invite Others to Play!
Once your pit is set up, it’s time to bring people together. Horseshoe throwing is perfect for:
-
Family cookouts
-
Backyard birthday parties
-
Casual hangouts with friends
-
Neighborhood tournaments
Introduce newcomers to the rules and start with casual games. You’ll be surprised how quickly the fun spreads.
🔚 Final Thoughts: More Than Just a Game
Building a horseshoe throwing pit at home isn’t just about tossing shoes—it’s about creating a space for connection, laughter, and timeless fun. Once it’s in place, your yard becomes a destination. It becomes a place where stories are swapped, rivalries are born, and good times are shared.
You don’t need to be a carpenter or athlete. All it takes is a bit of space, some basic tools, and the desire to keep an old-school tradition alive. And once you throw that first ringer? You’ll be hooked.
📣 Next Up: The Gear You Need to Play Horseshoes
Now that your pit is ready, it’s time to talk about equipment. In the next post, we’ll break down everything from regulation horseshoes to casual backyard gear—and how to pick the right tools for your style of play.
Hi there, and thanks for stopping by! My name is Larry, and I’m the voice behind PlayingHorseshoes.com. I love the game and have been playing since I was a kid. I started this blog because I am passionate about the sport, and with all the technology, I hope the sport doesn’t die. I plan to do my part to keep it going for me and my brother’s sake. Thanks for stopping by. Feel free to subscribe and comment. Thank You!