How to Build a DIY Horseshoe Pit Backstop That Looks Great and Works Even Better
Protect your property, save your gear, and upgrade your backyard with a smart backstop solution
🏡 Introduction: Why Every Horseshoe Pit Needs a Backstop
So, you’ve got your stakes in the ground, your pit leveled, and your favorite set of horseshoes ready to go. You’re about to pitch that perfect ringer… and then—clank!—your horseshoe ricochets into your fence, garden, or worse, your neighbor’s lawn.
Whether you’re a seasoned player or just starting out, a quality backstop is essential for any horseshoe pit. Not only does it protect your surroundings and gear, but it also makes retrieval easier, keeps your pit looking tidy, and adds a professional touch to your setup.
In this guide, I’ll walk you through:
- Why a backstop matters
- Step-by-step instructions to build your own
- Product recommendations
- Design ideas to match your backyard aesthetic
- A strong call-to-action, FAQs, and pro tips
🎯 Why a Horseshoe Backstop Is More Than Just a Barrier
Let’s be honest—if you pitch horseshoes often, you’re going to have a few wild throws. And that’s okay! But without a backstop, those errant shoes can:
- Damage fences or structures
- Land in flower beds or mulch
- Get chipped or cracked
- Fly into unsafe areas (like a sidewalk or play zone)
- Cause you to waste time walking and hunting for each shoe
With the right backstop, you:
- Contain missed pitches
- Prevent wear and tear on shoes and stakes
- Add visual boundaries for more accurate aiming
- Give your setup a professional feel
- Make cleanup and resets way easier
🛠️ What You’ll Need: Tools and Materials for a DIY Backstop
Let’s break down what it takes to build a sturdy, good-looking horseshoe backstop.
🧰 Tools:
- Power drill
- Circular saw (or hand saw)
- Measuring tape
- Level
- Work gloves
- Shovel or post digger (if anchoring into the ground)
🪵 Materials:
- Pressure-treated wood (2x4s, 4x4s, or fence planks)
- Outdoor-rated screws
- Optional: rubber mat, landscape timbers, rope, or netting
- Exterior stain or weatherproof paint (for style & protection)
🔧 Step-by-Step: Building a Simple Wooden Horseshoe Backstop
Here’s how to build a functional backstop that blends style with stability:
✅ Step 1: Choose Your Placement
Decide whether the backstop will be behind one or both stakes. If your pit is near a fence, a freestanding backstop is a better choice.
- Distance: Place it 12–18 inches behind the stake.
- Width: Aim for at least 4 feet wide, but 5–6 feet offers more coverage.
- Height: 2–3 feet tall is typically enough to catch errant throws.
✅ Step 2: Dig and Anchor the Posts
Use a post hole digger or shovel to create holes for two vertical posts.
- Depth: 18–24 inches for strong support
- Set 4×4 posts in concrete or gravel
- Make sure both posts are level and evenly spaced
✅ Step 3: Attach the Horizontal Frame
Cut your 2x4s or fence boards to fit between the posts. These will serve as the backstop face.
- Attach boards horizontally with 2″ wood screws
- Use a level to keep each board aligned
- Leave small gaps between boards for drainage and airflow
✅ Step 4: Add Protective Facing
To preserve your horseshoes, attach a rubber mat, turf, or netting to the backstop surface.
Recommended Product:
🛒 BalanceFrom Rubber Floor Mat Tiles
- Interlocking shock-absorbent tiles
- Durable and weather-resistant
- Great for cushioning impact behind your stake
These mats are easy to trim and mount behind or in front of the wooden frame. They protect both your backstop and your horseshoes.
✅ Step 5: Optional Design Upgrades
Want to level up your pit’s appearance? Here are a few stylish add-ons:
- Frame with decorative rope: Wrap rope around the top beam for a rustic look
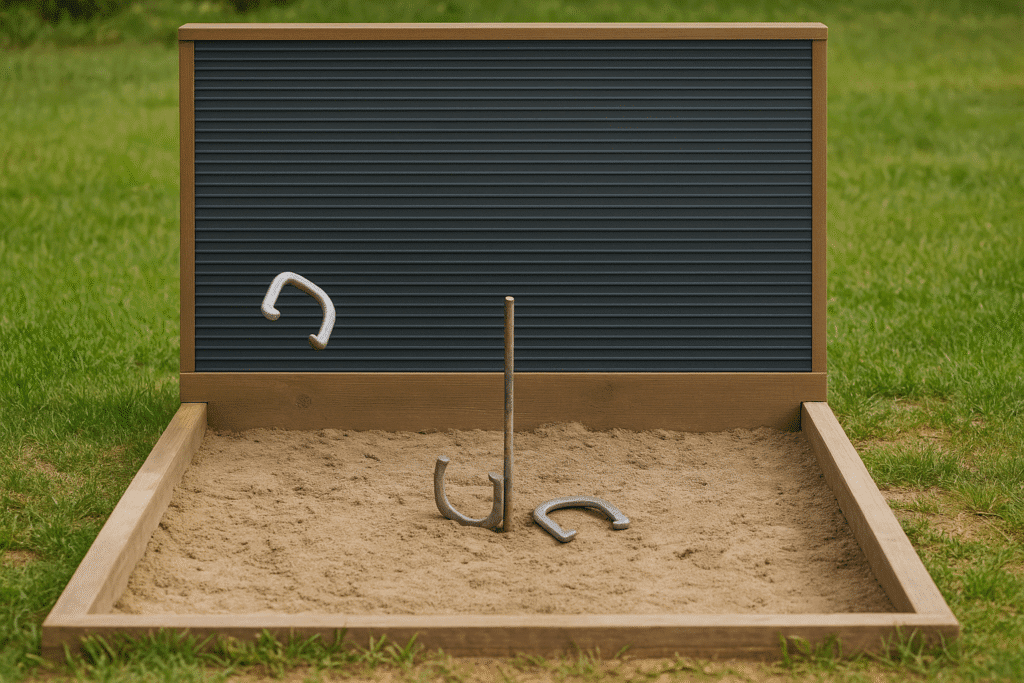
- Add a scoreboard: Mount a whiteboard or chalkboard on the side
- Landscape around it: Use mulch, gravel, or edging to make it pop
- Paint or stain it: Match your patio or fence colors
🎨 3 Design Ideas to Inspire Your Backstop Build
You don’t have to settle for a boring board! Here are three aesthetic directions:
🌲 1. Rustic Timber Backstop
- Use reclaimed wood or railroad ties
- Add old barn-style trim
- Sand it for safety but leave some texture
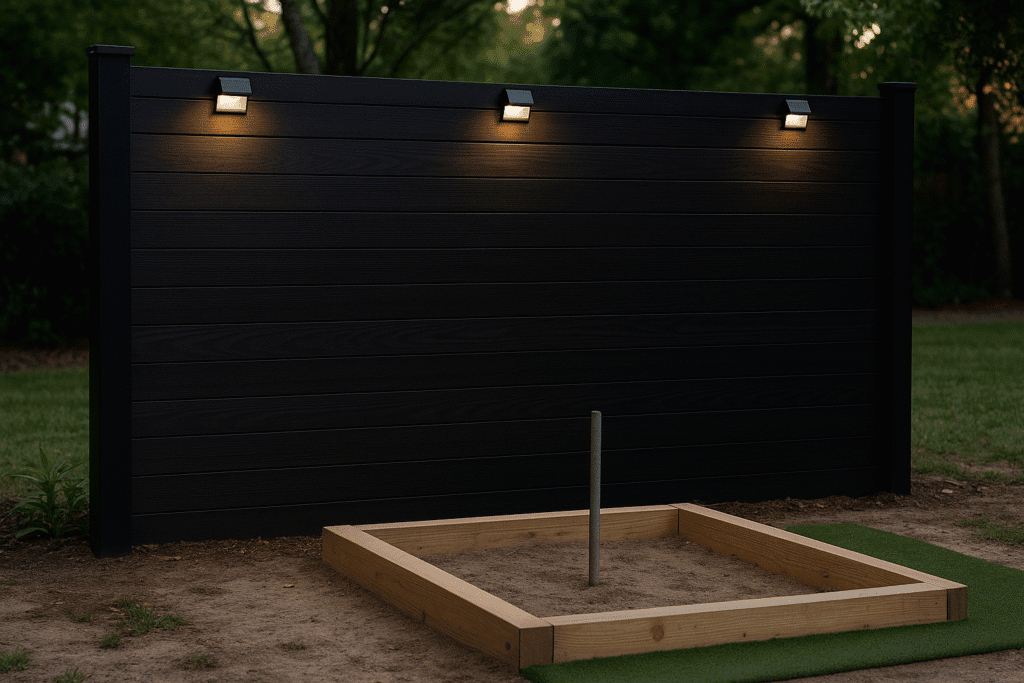
🏡 2. Modern Fence Panel
- Use premade fence panels or slats
- Paint it a sleek black, dark green, or wood stain
- Add solar lights to illuminate at dusk
🪵 3. Functional & Foldable
- Hinged frame that folds flat when not in use
- Attach wheels or handles for portability
- Great for renters or small yards
🛍️ Recommended Products for Your DIY Backstop
Here are a few Amazon-sold items to help you build smarter and play safer:
🪵 MTB Black Welded Wire Garden Fence Panel
- Durable and rust-resistant
- Great for attaching to wood frame
- Keeps shoes from flying past your backboard
🧱 BalanceFrom Puzzle Rubber Mats
- Protects horseshoes and wood from damage
- Water-resistant and easy to clean
- Absorbs shock from missed throws
💡 Brightech Solar Landscape Spotlights
- Adds visibility for night play
- Weatherproof and motion-sensitive
- No wiring required
🛠️ Backstop Maintenance Tips
Like the rest of your horseshoe setup, a backstop needs a little upkeep to stay in top shape.
🧼 Maintenance Checklist:
- Tighten loose screws every few months
- Re-seal or re-stain wood yearly
- Replace worn rubber or turf
- Sweep debris from the pit area regularly
- Check for splinters or warping after rain
💬 Call to Action
Ready to take your backyard game from basic to pro?
✅ Gather your tools
✅ Choose your design
✅ Grab the rubber mats and fence boards
✅ Build it this weekend!
Your horseshoes (and your property) will thank you. A solid backstop transforms a backyard pit into a polished playing space.
❓ FAQ: Horseshoe Pit Backstops
Q: Do I really need a backstop?
A: If you want to protect your gear, save time chasing wild throws, and prevent damage to nearby property—yes, a backstop is highly recommended.
Q: What’s the best material for impact protection?
A: Rubber mats or artificial turf work well to absorb impact and protect your horseshoes from damage.
Q: How far should the backstop be from the stake?
A: Place it 12–18 inches behind the stake for optimal protection without interfering with gameplay.
Q: Can I build a backstop without digging holes?
A: Yes. Freestanding or portable backstops can be built using heavy base supports or even weighted planter boxes.
Q: Can this be done in a single afternoon?
A: With pre-cut boards and the right tools, many players complete their backstop in 2–4 hours.
🔚 Final Thoughts
A backyard horseshoe pit isn’t complete without a well-built backstop. It’s one of those upgrades that makes playing more fun, protects your gear, and earns compliments from guests.
Whether you go for rustic charm or modern polish, what matters most is that your backstop works—and looks good doing it.
🔨 Build it right, pitch with confidence, and make every game a little more enjoyable.

Larry Mac
Hi there, and thanks for stopping by! My name is Larry, and I’m the voice behind PlayingHorseshoes.com I love the game and have been playing since I was a kid. I started this blog because I am passionate about the sport, and with all the technology, I hope the sport don’t die. I plan to do my part to keep it going for me and my brother’s sake. Thanks for stopping by, feel free to subscribe and comment. Thank You!