Backyard Horseshoe Court Setup: A Complete DIY Guide
If you’ve ever tossed a horseshoe across your lawn and thought, “I could really use a proper setup,” then this guide is for you. Whether you’re pitching for fun, preparing for backyard tournaments, or simply trying to improve your game, having your own DIY horseshoe court can seriously elevate your experience.
In this complete guide, I’ll walk you through everything you need to know to build a regulation-style court at home—including dimensions, equipment, setup tips, and product recommendations. By the end, you’ll not only have a functioning court, but one you’ll be proud to show off at every summer cookout.
🔧 Why Build a Backyard Horseshoe Court?
There’s a big difference between tossing shoes on uneven ground and playing on a purpose-built court. A dedicated horseshoe setup:
- Creates a more enjoyable, competitive experience
- Improves your throwing accuracy
- Minimizes bounce and erratic shoe landings
- Looks cleaner and more professional
- Encourages friends and family to play regularly
Plus, it gives you a chance to practice consistently, which is key to improving your ringer percentage.
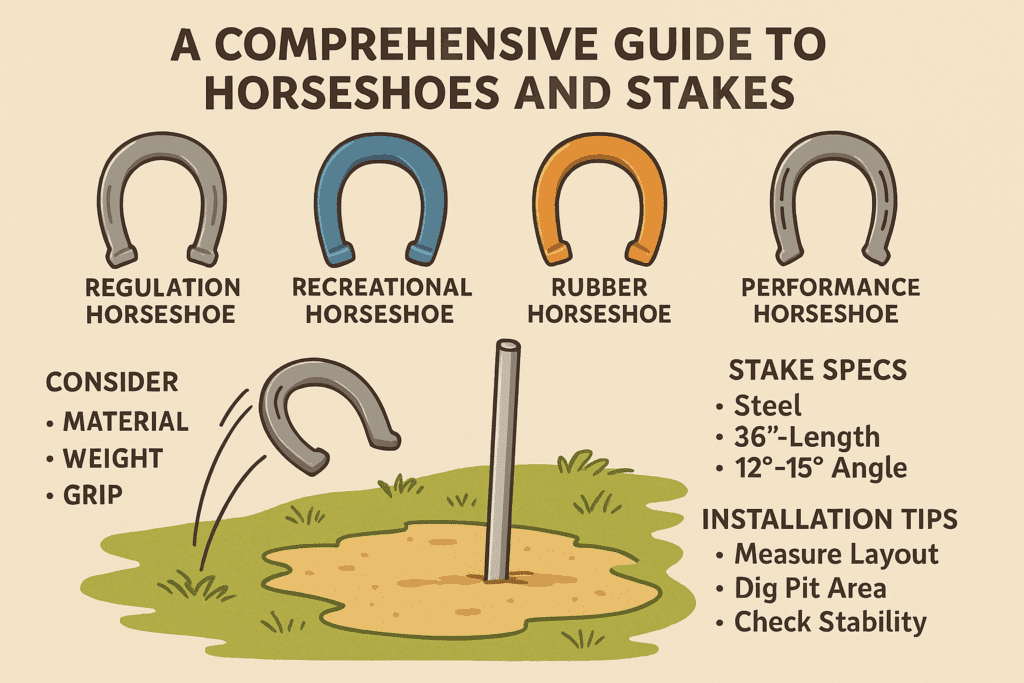
📏 Regulation Horseshoe Court Dimensions (Explained Simply)
If you’re aiming for a regulation-compliant court (like those used in tournaments), here are the official specs:
- Distance between stakes: 40 feet (measured end-to-end)
- Stake height: 15 inches above the pit surface, angled forward ~12 degrees
- Pit size: Minimum 3 feet wide × 6 feet long
- Foul lines: 27 feet for women/juniors; 37 feet for men
But don’t worry—if you’re building a casual setup, you can adjust the distances to fit your space.
🛠️ Tools & Materials You’ll Need
✅ Essentials:
- Two 36-inch steel rods (for stakes)
- Tape measure (preferably 50+ ft)
- Level and angle tool
- Sand, clay, or loose dirt (for pit material)
- Wood or plastic for borders (pressure-treated lumber works great)
- Drill, shovel, post-hole digger
- Concrete (optional, for permanent stake placement)
🧰 Optional Add-ons:
- Backboards (to catch wild throws)
- Shade structure or awning
- Lighting for nighttime play
- Horseshoe scoreboard
- Horseshoe carrying case
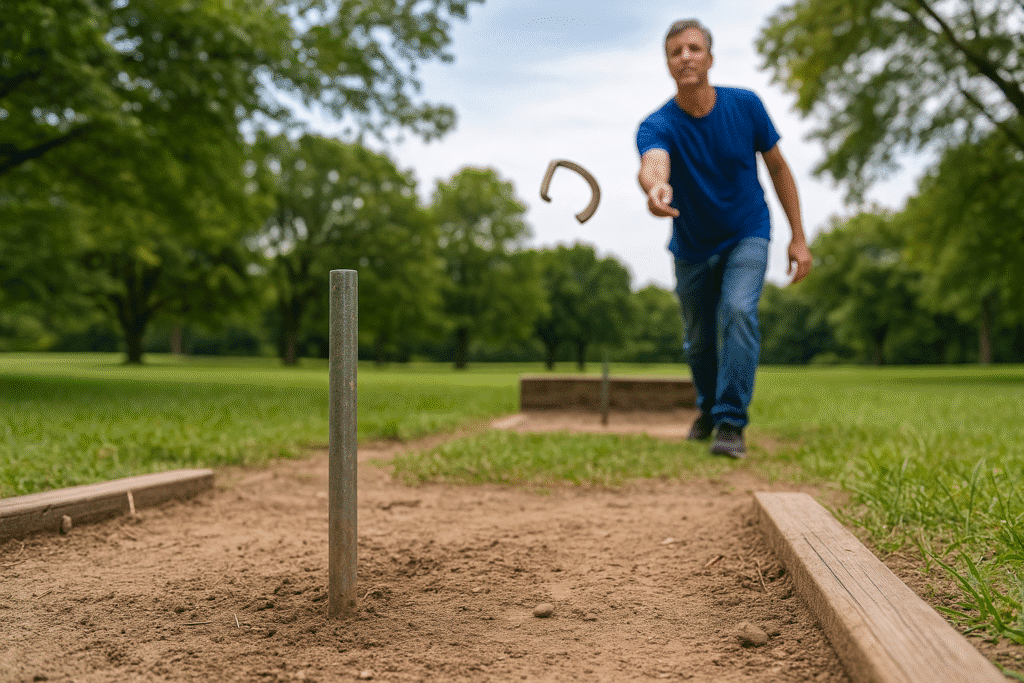
🪛 Step-by-Step: Building Your Backyard Horseshoe Court
Step 1: Select the Perfect Spot
Look for:
- A flat, level area
- At least 45 feet of length
- Room for walking space behind each pit
- Away from windows, cars, or breakable things!
Step 2: Mark the Court Layout
- Use stakes and string to outline a 40-foot rectangle.
- Mark the center point of each pit to place your stakes.
- Measure diagonally (corner to corner) to ensure the court is squared.
Step 3: Install the Stakes
- Dig a 12–15 inch hole for each stake.
- Angle stakes forward roughly 12° toward the opposite pit.
- Use concrete if you want them permanently anchored. Otherwise, compact the soil firmly around the stake.
- Make sure only 15 inches of the stake shows above the pit surface.
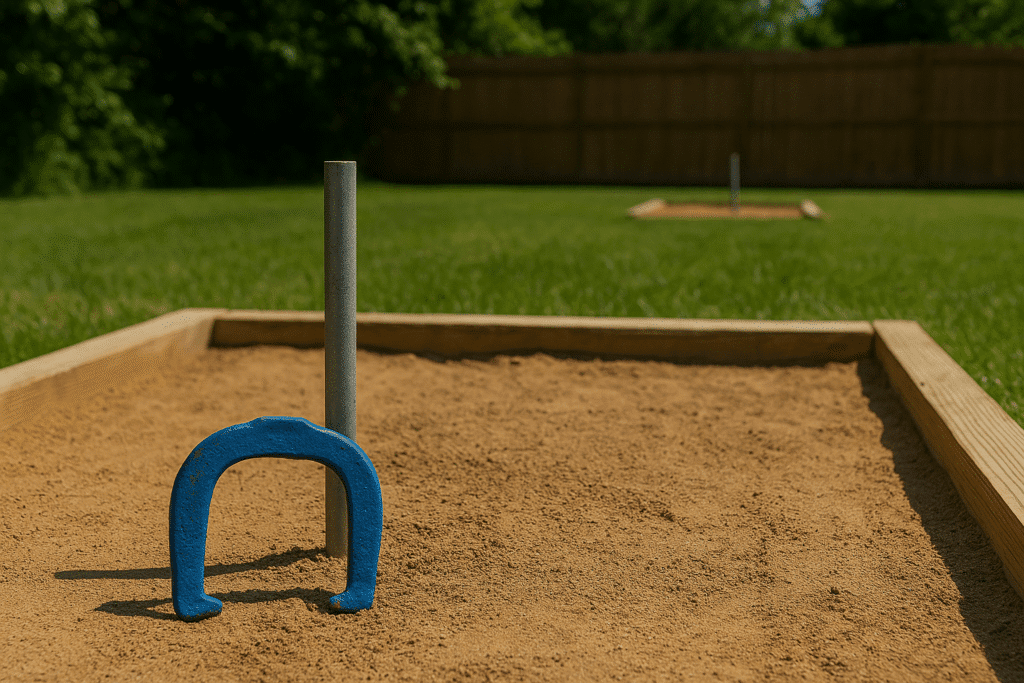
Step 4: Build the Pits
- Create a frame around each pit using 2×4 or 2×6 boards, forming a 3×6 ft rectangle.
- Secure the frames with stakes or ground anchors.
- Fill with:
- Clay for competitive bounce control
- Sand for casual and beginner-friendly play
- Level the pit surface and keep it loosely packed.
Step 5: Add Borders and Backboards
- Optional: Install vertical backboards behind each pit to catch overthrows.
- Use wood, plastic, or rubber mats.
- Line the court perimeter with gravel or landscaping material for visual appeal.
Step 6: Mark the Foul Lines
- Men’s foul line: 37 feet from the opposite stake
- Women’s/junior foul line: 27 feet
- Use a permanent marker, spray paint, or wood strip

🧲 Recommended Equipment for Your Backyard Setup
Now that your court’s ready, make sure your equipment matches the quality of your build.
🎯 Challenger Pro Pitching Horseshoe Set
- Regulation weight and shape
- Powder-coated for grip
- Durable forged steel construction
- Great for all skill levels
🎯 EZ Flip Training Set
- Engineered for consistent flip technique
- Lighter for casual or younger players
- Available in vibrant colors for easy visibility
🎯 St. Pierre American Professional Set
- Tournament-level quality
- Designed for perfect balance and spin
- Includes stakes and rulebook for setup guidance
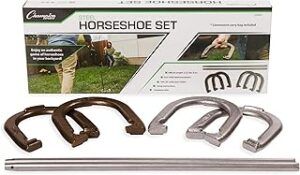
Horseshoe Game Set
All of these products are built to last and ideal for your new backyard court.
🧠 Tips for Maintaining Your Court
- Rake or level the pit surface before each session
- Keep clay or sand moist (especially in dry climates)
- Check stake stability monthly
- Clean horseshoes after use to prevent rust
- Cover your pits during heavy rain
🔁 Backyard Horseshoe Rules (Simplified)
Whether you’re playing for fun or keeping score, here’s a casual ruleset to follow:
🧩 Basic Rules:
- Two players alternate throwing two horseshoes each
- Only the player with the closest shoe(s) scores
- A ringer (around the stake) = 3 points
- Closest shoe within 6 inches = 1 point
- Leaners may be worth 1 point depending on your house rules
- First to 21 or 40 wins, depending on your setup
💡 How to Improve at Horseshoes on Your New Court
- Warm up with 10–15 tosses before playing
- Record your games to spot inconsistencies
- Try both flip and ¾-turn throws to see what works best
- Practice from different distances (30 ft, 37 ft, 40 ft)
- Invite others to play and challenge your skills
💬 Frequently Asked Questions
Q: How much space do I need for a backyard horseshoe court?
A: Ideally, 45 feet in length and 10 feet in width gives you ample room for pits, walkways, and safe play zones.
Q: What’s the best material for horseshoe pits?
A: Clay is preferred for tournaments due to bounce reduction, but sand works well for casual play and is easier to manage.
Q: How do I keep horseshoes from bouncing out of the pit?
A: Use soft clay and keep it slightly moist. Deep, loose sand can also help absorb the impact.
Q: Do I need to concrete the stakes in?
A: Not always. For a temporary setup, compacting soil tightly works. For permanent setups, concrete ensures long-term stability.
Q: What’s the official scoring in a game of horseshoes?
A: Ringer = 3 points. Closest shoe within 6 inches = 1 point. Only one player scores per inning. Game ends at 21 or 40 points depending on your format.
🧱 Final Thoughts: Build It Once, Play for Years
A backyard horseshoe court isn’t just a weekend project—it’s an investment in fun, fitness, and family time. With the right setup and the right gear, you’ll enjoy more accurate throws, fewer injuries, and way more satisfaction from the game.
So grab your gear, mark off your space, and get building. You’ll be surprised how often people want to come over once they hear you’ve got a full-on horseshoe court at home.
👉 Ready to Start Your Build?
Explore recommended pitching horseshoes, grab your materials, and follow the step-by-step instructions above. By this weekend, you could be landing ringers in your own backyard.
Hi there, and thanks for stopping by! My name is Larry, and I’m the voice behind PlayingHorseshoes.com I love the game and have been playing since I was a kid. I started this blog because I am passionate about the sport, and with all the technology, I hope the sport don’t die. I plan to do my part to keep it going for me and my brother’s sake. Thanks for stopping by, feel free to subscribe and comment. Thank You!