🎯 How to Practice Horseshoes Like a Pro: At-Home Drills, Gear & Setup Tips
You don’t need a fancy court or a league to become a top-tier horseshoe pitcher. With the right setup, gear, and a few proven drills, you can improve your accuracy, grip, and consistency—right from your own backyard.
Whether you’re new to the game or aiming to dominate your next tournament, practicing horseshoes at home is one of the most rewarding ways to level up your skills.
This guide covers practical drills, essential gear, and setup ideas for players of all skill levels. You’ll learn how to pitch more ringers, fix your form, and practice like a champion—even if your “stadium” is your side yard.
🟢 The Importance of Practicing Horseshoes the Right Way
Most backyard players just “toss and hope.” But if you really want to improve, you need a plan. Practicing with purpose:
- Increases your ringer percentage
- Builds muscle memory for consistent throws
- Refines your grip, release, and follow-through
- Prepares you for league or tournament competition
And the best part? You don’t need a regulation court to get started. You just need the right setup and a few training tools.
🛠️ Step 1: Build a Practice-Friendly Horseshoe Setup
✅ Space Requirements
You don’t need a full-size league court to practice effectively, but you do need:
- At least 30–40 feet of clear space (lengthwise)
- A flat surface for level throwing
- A target area where shoes can land safely (sand, dirt, or clay)
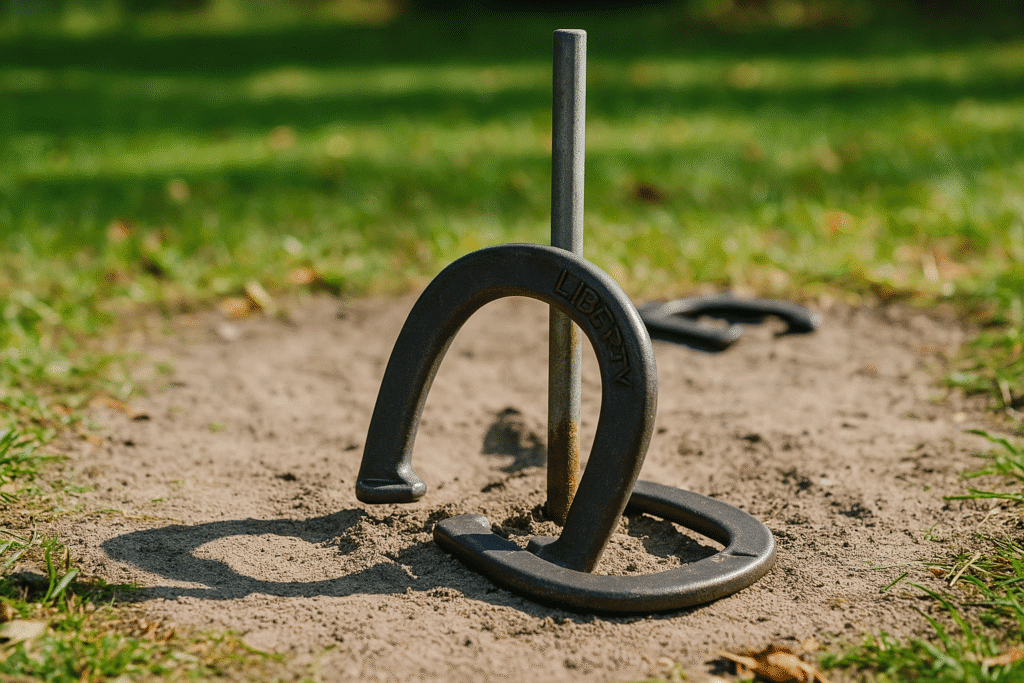
✅ Stake Setup
For realistic practice, install at least one regulation stake:
- 36 inches long, 1-inch thick steel
- Set 15 inches above the pit surface
- Tilted forward at a 12-degree angle
- Positioned with room for a proper throw arc
If space is tight, start with a single stake and throw from a measured 20- to 30-foot distance, then work up to full 40 feet.
✅ Pit Material
Use:
- Moist clay (best grip and realistic landing)
- Play sand (easy to maintain and common)
- Fine gravel or turf for alternative, lower-maintenance setups
Frame your pit with landscape timbers or wood boards to keep the material in place.
🎯 Step 2: Use the Right Gear for Practice
Practicing with improper equipment builds bad habits. Start with gear that mimics what you’ll use in real games.
🧲 Regulation Horseshoes
- NHPA-approved steel horseshoes are ideal for skill development
- Look for balanced shoes around 2.5 lbs
- Avoid cast iron or novelty sets—they chip and throw inconsistently
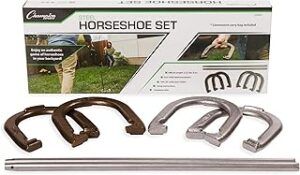
Horseshoe Game Set
🎯 Practice Stake
If you’re working on foot placement or drills, use a portable stake with a stabilizing base to allow for indoor or patio training. Some players use shorter stakes for target work inside a garage or training zone.
🛍️ Additional Practice Gear:
- Throwing mat or stance board: Helps with consistent foot placement
- Ringer counter or scoring app: Track improvement over time
- Carrying case and gloves: Protect gear and hands during long sessions
🔁 Step 3: Do These At-Home Horseshoe Drills
Now that you’ve got a solid setup, let’s get into the drills that will sharpen your skill and increase your ringers.
🔹 Drill 1: The 10-Ringer Challenge
Goal: Practice accuracy and consistency
How to do it:
- Throw 10 shoes in a row at the stake.
- Count how many land within 6 inches.
- Reset and repeat, aiming to increase your score over time.
- Track ringers separately.
This helps build rhythm and tracks progress week to week.
🔹 Drill 2: Grip & Release Repetition
Goal: Improve your release consistency
How to do it:
- Hold the horseshoe in your pitching grip.
- Practice your swing and release motion slowly without throwing.
- Focus on smooth movement and timing.
- Repeat 20–30 times daily.
You’re training your body to memorize the release, which is key to consistency under pressure.
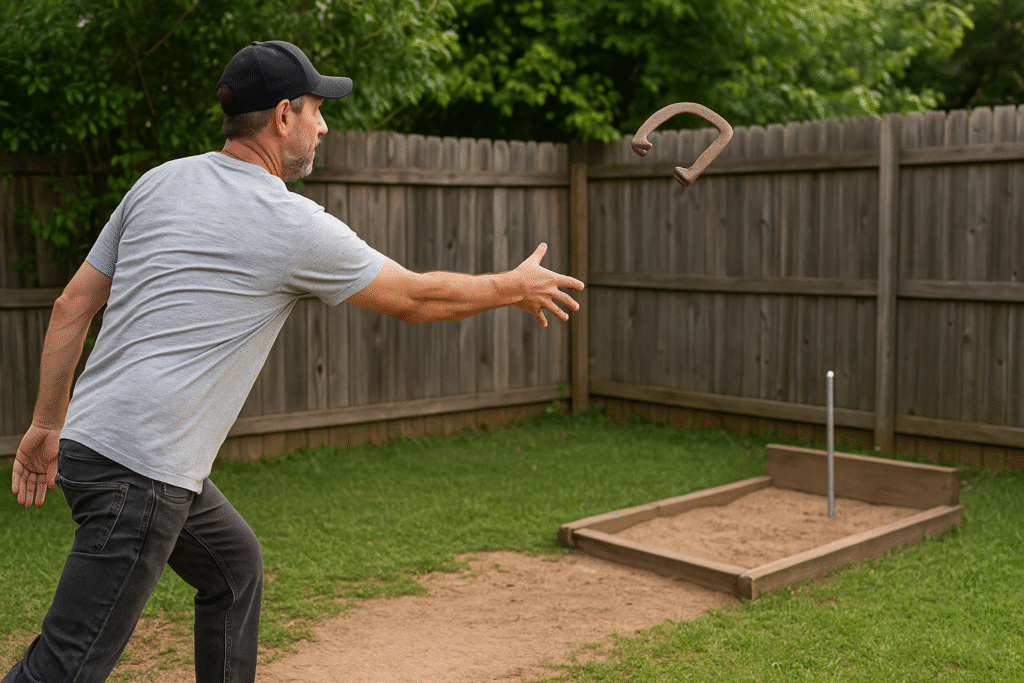
🔹 Drill 3: The Walkback Drill
Goal: Build accuracy at increasing distances
How to do it:
- Start 15 feet from the stake.
- Land three shoes close to the stake before stepping back 5 feet.
- Repeat until you reach your full throwing distance.
- This builds accuracy, control, and confidence.
🔹 Drill 4: Foot Placement & Stance
Goal: Maintain repeatable mechanics
How to do it:
- Mark your foot placement with chalk or tape on a stance mat.
- Practice your throw while ensuring your feet land in the same place each time.
- Helps eliminate body sway and off-balance throws.
🔹 Drill 5: Left-Right Ringer Drill
Goal: Work on directional control
How to do it:
- Pick a target point just left or right of the stake.
- Try to land shoes consistently on that side.
- Alternate sides every 10 throws.
This sharpens your aim and simulates “placing” shoes when going for points in a close match.
💡 Bonus Tips for Smarter Practice Sessions
- Warm up: Loosen your shoulders and arms before throwing to prevent fatigue and injury.
- Limit your sessions: Focus on 30-50 good throws, not endless tossing. Quality beats quantity.
- Record yourself: Use a phone or tripod to capture your form. Watch back to adjust grip, stance, and follow-through.
- Join a group or league: Feedback and competition accelerate learning.
🧠 Mental Focus: The Secret Weapon in Practice
Great horseshoe players don’t just throw—they visualize the outcome. During practice:
- Picture the shoe landing near the stake before every throw.
- Focus your breathing to stay calm under pressure.
- Develop pre-throw rituals to create muscle memory.
Even a short pause and visualization routine can dramatically improve consistency and confidence.
🏆 Long-Term Practice Strategy
Here’s a suggested weekly plan if you’re aiming to pitch like a pro:
- Day 1: Warm-up, 10-Ringer Challenge, release drill
- Day 2: Walkback drill, left-right placement drill
- Day 3: Rest or light form work
- Day 4: Full match simulation (scoring + tracking)
- Day 5: Grip + release reps, stance work
- Weekend: Friendly game or league night
Keep a journal or digital tracker to note ringers, percentage improvements, and problem areas.
🏁 Final Thoughts: Your Backyard is Your Training Ground
You don’t need a full league setup to practice like a professional horseshoe pitcher. With the right stake, surface, and mindset, you can train effectively in your own yard, driveway, or garage.
The keys to better play aren’t mystery tricks or expensive gear—they’re consistency, smart drills, and attention to your form.
So get out there, set up your space, and start pitching with purpose. Before long, your casual backyard tosses will turn into ringers, your form will feel automatic, and your confidence will grow with every step to the stake.
🎯 Play like a pro—even if you’re just pitching at home.
Hi there, and thanks for stopping by! My name is Larry, and I’m the voice behind PlayingHorseshoes.com I love the game and have been playing since I was a kid. I started this blog because I am passionate about the sport, and with all the technology, I hope the sport don’t die. I plan to do my part to keep it going for me and my brother’s sake. Thanks for stopping by, feel free to subscribe and comment. Thank You!